Monday, May 6, 2013

Garden

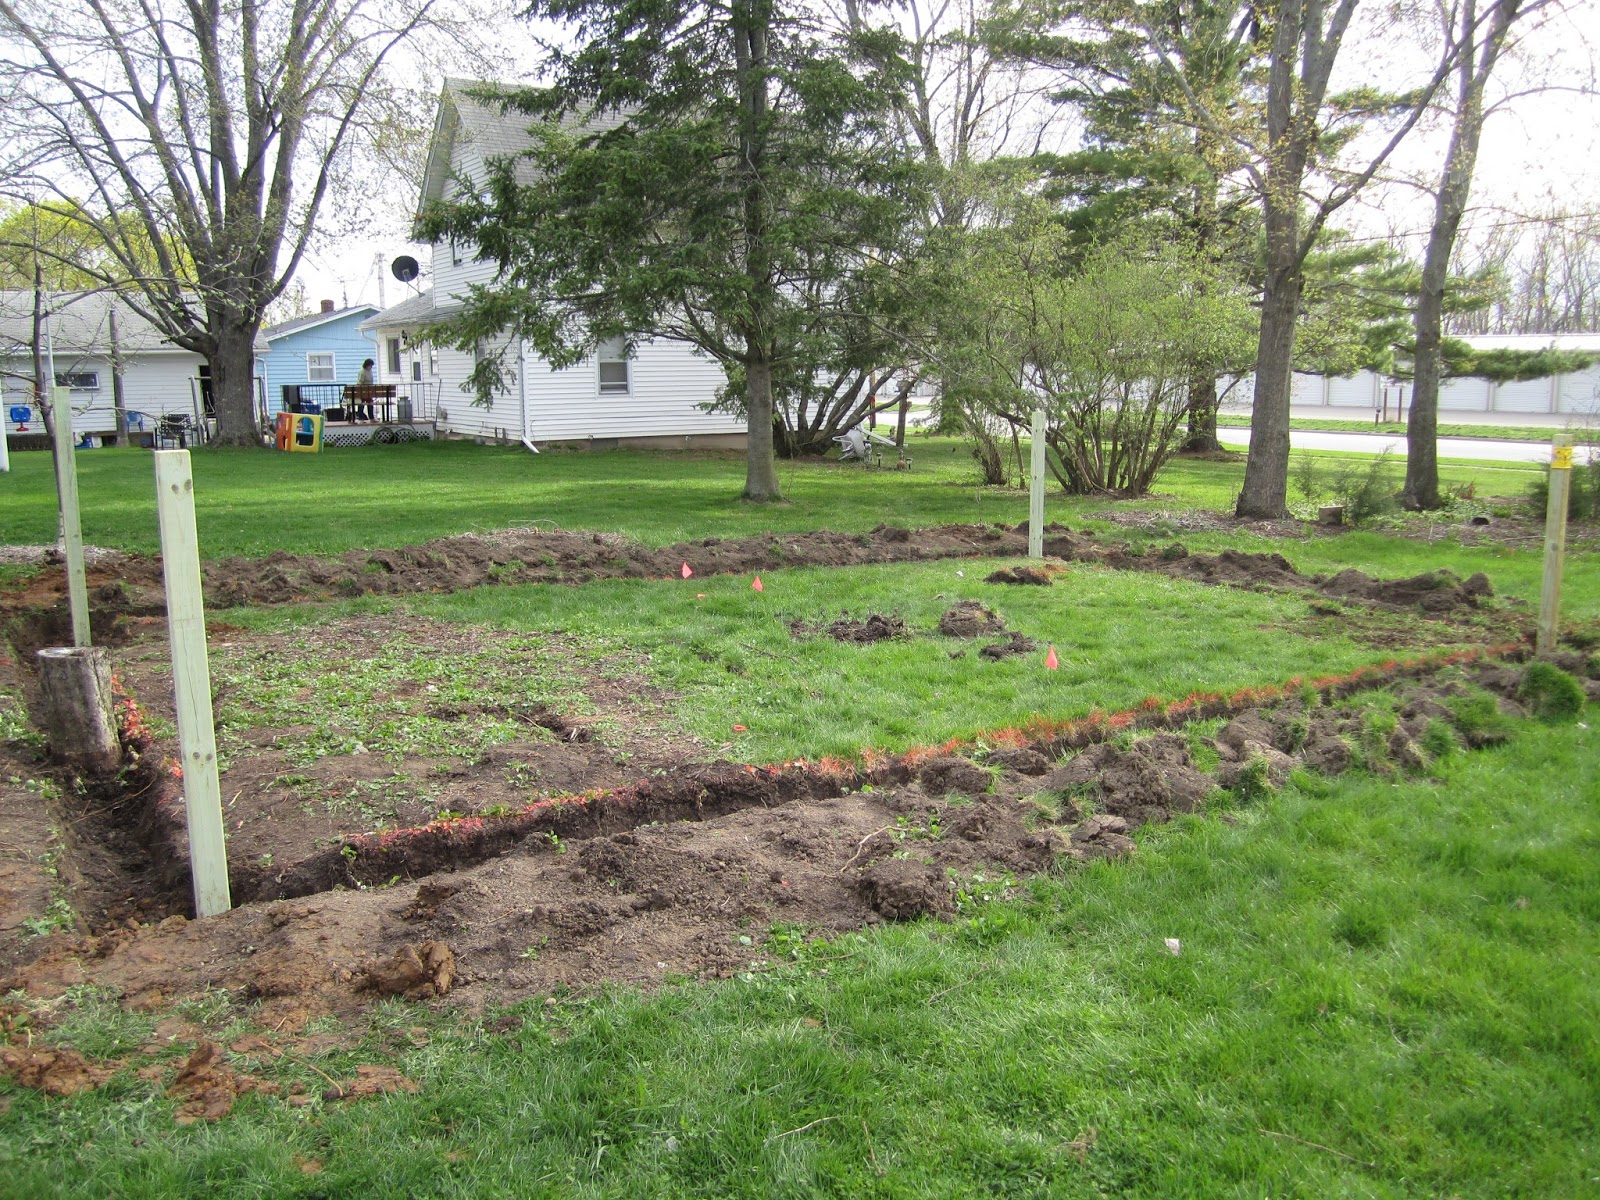
Well, I'm not sure we needed another project, but we got one anyway. Sunday we started on the garden with the help of James and Zach. After talking with some people about gardens, we decided that eventually we'll want six 4x10 ft beds. With some space between them for walking and such, that made our garden come out to 27x16 ft. So, we staked it out and painted some orange guidelines.


And  then we got to digging ( and digging and digging and digging). To keep out those persistent woodland creatures (side note, I saw a bunny chasing a squirrel through our yard the other day. We live in a children's book, apparently) we have to put in a pretty serious fence. Not only does it need to be about 4 ft tall, but we are going to sink it 6 inches into the ground and kick it out six inches at a 90 degree angle. That way if anything digs down, it will hit the fence, even if it backs up a bit and tries again. This meant we had to dig a trench around the perimeter.


We're still debating ditching the garden and putting in baby crocodiles instead. Once that was done, we had a lot of holes to dig. Since the fence will be four feet tall, we decided the corner posts should be 4x4s to help keep things square and solid. We stood around and debated for a bit about how deep they needed to go in... 1 ft was the first suggestion, but that seemed too shallow, so then we thought 2 ft, but none of us really knew for sure so we called Mr. Wayne to see if he might know. Turns out, he estimated about 40 inches would be a good depth to keep the freeze/thaw and frost from pushing the post slowly up and out of the ground. Well, that was deeper than we were planning, but we reset our expectations and got to work.


The best technique was to use a breaker bar to loosen the dirt and then the post digger to pull the loose dirt out. Eventually we got all four corners done and the post put in, squared up and the holes filled in. It took quite a bit of time and all 4 of us (one to man the level, one to hold the pole, one to shovel dirt and another to tamp it down) but we made it.

To round out the day we also found a home for the swing and Matt cut the grass while I picked up the branches and pine cones that had fallen during the winter.


And then he changed the oil in both cars. Is he superman? Perhaps yes. And I'm pretty glad he's my man :)


Sunday, May 5, 2013

Busy weekend

Well, we were very busy this weekend, Matthew even more than me because I took a quick jaunt to chicago to celebrate Kate's birthday with her and Nate. While I was gone, Matt was very busy. Friday night he finished mudding and taping the master bedroom.


Then, on Saturday, while I was shopping with Kate, Matt and Mark replaced the toilet upstairs so it never overflows on us again

And here's what it looked like underneath. The floor wasn't super strong (especially next to the metal flange) and of course, the floor isn't level.


So, Matt and Mark made a peanut (it mimics the shape of the toilet) out of OSB to add some support. Since this added a little extra height, they had to get a thicker wax ring, but once that was in place they were good to go. 


And there it is, our new commode. Pretty, right? Not only that, because it is a low flow 1.28 gallons we get a 50 dollar rebate from the village of Oregon. And, it flushes better than the last 5 gallon guzzler. Isn't progress great?


Then, on Sunday we decided to start tackling the garden. I think I'll do a separate post for that one. 

Saturday, May 4, 2013

Swing on

Roy and Rayanne came over today to drop off their wedding gift, a brand new swing set they made themselves (we have awesome and talented friends)

Since it is easier to move in pieces, there was some assembly required.

First Rayanne laid out the supports so Roy could add the cross piece that holds them in the A shape.


 Once that was done I helped stabilize the top piece and Roy and Rayanne worked on A frame around it.


Then they did the other side.


Next was adding some bracing pieces to support the top post and hung the swing.


 And lastly Roy shaved off the little bits of the A that stuck up above the top post so that everything was neat and tidy.


And voila! We have a swing. We did move it from the driveway but are still debating its permanent home. Swings like a dream though and we are super excited about it. Thanks again to Roy and Rayanne for such an awesome wedding gift!

Wednesday, May 1, 2013

mud, tape, repeat

With the drywall up, our next moves in the bedroom have been to seal it up good and tight in preparation for painting. In preparation, we watched a couple videos on how to tape and mud, since neither Matt nor I had done it before. To be honest, it didn't look to bad, so we dove right in.

First we removed all the old tape and made sure we had a clean surface to work with.


Then, Matt mixed up a tray full of mud about the consistancy of "runny sour cream" (This was a tip from one of the videos for working with tape, since the tape will absorb some of the moisture)

Then we slathered it on liberally, laid a piece of tape up and squeezed out all the excess. Forgive the lack of "during" pictures... I was helping and got a little covered in mud, which I didn't want to get on the camera. The end results look something like this:

In the corner


At the intersections


Matt also put up the piece of board that we had to take down that it got wet


And patched the small hole we cut to run some wire in a pretty ingenious way. First he measured and then he carefully cut out a piece leaving some of the paper around it. That way when he put it up, he could mud around it and it would stick.


Like so


We'll float some mud around it to smooth it out and then you won't even be able to tell.

As an added bonus, we had to take down a bunch of the trim to get into the corners, which is fine because we were planning to replace it anyway.


And, because he loves us so much, Leroy even got in on the action, he must have sat in it somewhere (don't worry, we cut it out so the little guy wouldn't get it caught it in his throat.


We've still got some to go, but we're working out way through it.

Thursday, April 25, 2013

Bye bye rafters, hello drywall!

Last night Mark and Joe came over and we say goodbye to the lovely wooden supports in our master bedroom in favor of the more conventional drywalled look.

First step was to put drywall glue on the rafters


Then, the first sheet went up the screws went in and Matt took a stab at cutting out the pot light. Turns out, the Dremel has a definite "hand" and its not left (unlike Matt who is a lefty). After we figured that out, Mark became the go-to light cutter, and he did an awesome job.


The next two sheets went up really quick and before we knew it we had half the room done. Notice the specially formulated blue board which is made to withstand moisture better than the regular stuff. Hopefully we won't have another leaky toilet, but if we do, we are now prepared.


Then came some planning and scheming to figure out how to do the other half of the room. See the room is mostly square, but it has a little jut out near the door because of the closet and old fireplace. We ended up deciding to mimic what we did on the other side of the room so all the seams would line up. We also had to deal with the ceiling fan, but, Mark to the rescue again. we did some very careful measuring, cut a small hole and just fed the wires through (after cutting the breaker, of course, I've learned my lesson). And just look at that cut out job (Mark again)


That last corner piece did give the boys some trouble (it was getting late and that kind of spacial reasoning is difficult under any circumstances) but they got it done and it looks amazing!


Thanks also to Cori for making an amazing dinner that I got to eat piping hot and the boys got to eat a couple hours later. (Their work ethic is way better than mine, clearly).

Next up, mud all the screws, the seams, the corners and sand it smooth so we can paint.

Tuesday, April 23, 2013

prep work

Over the past few days we've made some progress on the prep work needed before we put up the drywall on the ceiling in our master bedroom.

Remember that old rusty pipe? Well Matt sanded it down and spray painted it with a Rustoleum product that prevents rust. He also painted the boards around it with Kilz, just in case there was any lingering mold from the water that leaked in from the bathroom.


We also added some supports to the copper pipes that run across the room (as it was suggested we do by inspector Mike when he came to look at the electrical)


Over the weekend, we also did a couple other little things. Like finally hang the paper towel rack


Put the corner back on the house (after only, oh, um, the entire winter). Don't worry, that nail we put in has a rubber washer, so its water tight.


and do a little more shoring up of the garage roof. We've gotten a lot (A LOT) of rain lately and are still working on getting it completely water-tight. Getting closer and closer though


Tomorrow night, we start on the drywall!

Thursday, April 18, 2013

We have lights!

I need a uber-exclamation mark. the regular one just doesn't cut it. That's right, tonight Matt and I connected up the rest of the wiring for the lights.

First we put the wires back in the box and the covers on. Dimmer is on the left and the switch for the fan is on the right (since we haven't bought the fan yet, that will have to wait for a later post)


Then we strung the wire into the box and connected up the new box. We left some wire in case we ever need to move the boxes around. Its easy to make wire shorter, pretty much impossible to make it longer... (also, Matt wanted me to let everyone know that he did tack up the wire after this picture was taken, so it is to code)


Then, we gave it a test run. Here's dim:


And here's full strength


It is super awesome. You tap twice to turn on full strength, once to go to the level of dim it was when you turned it off. Each location can dim the light up or down using the little tabs on the side and it fades to off when you tap once with the light already on. I can't wait till we drywall it all back up and get to move back in. I might just stand there and turn them on and dim and off for a while.