Sunday, June 30, 2013

Sunday of awesomeness

So, I'm usually not one to toot our own horn, but we had a pretty awesome day.  As you all know, we've been working on the garden pretty steady for, oh, like 2 months now. (so much for quick and easy projects :) ) Well, when we first put it in, we weren't getting the every day downpours we have been recently, so Matt had the great idea of trying to get water out to the garden in a more permanent way than dragging a hose over there every time. The idea was to bury a hose line and then we'd have a dedicated line out at the garden every time that wouldn't kill the grass or inhibit mowing. We've been kicking around the idea for a while and today we decided to make it a reality. Of course, this meant digging another trench...


 It really didn't take as long as I thought it might and after about an hour Matt had it pretty much finished.


So we hooked up the now hose splitter we got (does it look like a fat little man to anyone else?), attached the hose and ran it under the railroad tie and down the 


In no time we were filling it back in


And I turned the sod back in the hopes of salvaging some of the grass. 


We even managed to scare a garter snake. I gotta say, its like a zoo over here. Squirrels, rabbits, chipmunks, toads, frogs and now a snake!


And here's the finished product. We also bought some grass seed and sowed that over the the disturbed ground. We'll see how it goes but between the two I'd hope we'll get the grass back.


Then, we tackled attaching the hose at the other end. We tacked the hose up using some copper brackets and attached a shut off valve between the two hoses. Finally, we attached a hose holder at the top and we were in business. 
  

 Add on a watering attachment and it doesn't get better than that.

Here's Matt testing it out.


As if that weren't enough work, we also decided to tackle the grassy ugliness in front of the beds. While we aren't planning to put the other beds in this year, we do want to be ready. The plan is to sow alfalfa to prep the soil for next year. In prep for that, we needed to smooth out the beds and kill the grass so the alfalfa has a chance to grow. So I spent quite a bit of time turning over the soil. First in front of the beds.


And then back around behind them as well. Here's what it looked like when I got done.


Now, you might be saying, hey, you aren't going to plant anything in the walkways, why did you turn the grass over there? Well, the answer is that we are planning to mulch everything that isn't growing, and we started today. I figured turning over the grass would discourage it from growing more than just mulching would. We'll have to see how that pans out... looks pretty though.


Now I just have to do around the other bed.

In other news, our garden is producing! Look at all those awesome beans. And we have baby cukes and zucchini too.

One at a time

Outlet that is. As you might know, our upstairs has been, well, lacking in the electrical department. In fact, when we moved in, there weren't any outlets at all in the little bedroom. Matt and Mark put one in a while ago, but on Sat Matt decided it was time for one more. 

Here you can see Matt, with Leroy's help, finding the perfect position for the new outlet.

And here he is cutting out the hole


At that point he went up into the attic and did lots of things I dont' have pictures of to make it possible to run wire. All I know is that it involved some 12/2 wire, a 48.5 inch 2x4 and some screws. But after about an hour, we were ready to run it down the wall. It took three tries, mostly because the plaster walls provide numerous opportunities to get stuck on the way down, but eventually we made it.


And here's the finished product. One down, two more to go!


Saturday, June 29, 2013

We are significantly cooler than we used to be

Or at least, the upstairs is now that we bought a new air conditioner for the little bedroom and put James's up in his room. We started in the little bedroom with the new air conditioner. First we had to get it out of the box

 Then, we spent about two hours staring at the window and trying to figure out how to get the unit to actually sit right in the sill. See, we have vinyl windows, so we don't want to have to drill into them, which means we needed to get creative. The two hours of creativity yielded us an L-shaped board to sit over the sill and another board to act as a pseudo sash for the window, which doesn't sound all that creative, but a lot of thought went into it, don't be fooled. Here's matt with the L board.


And what it looks like in the window


And the finished product. Notice the lovely paint job that makes it blend in really nicely with the window


And the finished product after we spent some time sealing all the gaps with foam and window stripping. Looks pretty good, right?


The next night Matt helped James do the same for his window. Here's what the first iteration looked like.


James's window is slightly different than the one in the little bedroom and instead of a large sill it has just a little lip. So Matt and James designed this little piece, pretty great right?


Well, it was, but when the put the air conditioner on it, they noticed that it would be even greater if the air conditioner could sit down into the top of the piece. So, they set up the router portion of the table saw.


Here's what it looks like set up. The router is that bit sticking up surrounded by red to the left there and the guide can move back and forth so that you can position the router under the board where you please.


Here's the first test run


 And here is James making the cut on the board.


And the final product.


Looks pretty amazing, right?


And we can all sleep better and be a little cooler than we were a few days ago.

Sunday, June 16, 2013

We have a gate!

Matt and I spent the day, surprise surprise, working on the garden again.. This time, it was the gate we were concentrating on. We did a lot of measuring, planning, and plain old staring at the hole where the gate would go. We finally decided on a mostly solid gate with vertical slats, two horizontal, and one diagonal support. After measuring a number of times, we figure out that we could fit 11 boards with even gaps of 3/8 inch (not exactly sure how we lucked out there, but pheeew)

Here we are trying out the spacing design.


And here are the first few boards. We used 4x4s to help keep the tops and bottoms level (held steady by some lovely weed and bug killer)


Then, after we had all the slats down, we flipped it over and put on a diagonal piece to prevent "gate sag" which is, apparently, a thing. Matt's lovely new miter saw did the trick beautifully and what I thought might be a three try endeavor involving bad cuts and a few tears went off without a hitch.


Then we added the hinges to the gate and headed to the yard. We propped the whole thing up on a 2x4 that we leveled and then screwed the hinges to the post. After that, we added the latch. Here it is closed.


And here's an open shot. The amazing thing is that it's so level that you can open it to any angle and it will just hang there happily, no self closing at all!


We also finished putting up the rest of the boards for the fence. Next steps, finish stapling, cut the posts to the right height and add caps, and finishing filling in the trench and landscaping. We're getting so close!

Saturday, June 15, 2013

We're on the home stretch

Well, we've been working pretty steadily on the garden and I'm happy to say I think we might finally be able to see the light at the end of this project. Last weekend I put up more of the fence boards and then during the week we fashioned a trellis for the second bed where I planted some viney things that could us some support. (ok, full disclosure here, I'm not exactly sure what they are. I did know when everything was nice and neat in its little starter tray, but after re-potting into solo cups, well, I sort of got lax. I figured I'd be able to look online for leaf shapes and figure it out. Turns out, they all look very much the same, so there's some fun veggie surprises in our future.)


Then today, we got working on one of the last remaining pieces, the gate. Well, ok, not the gate exactly, but the entrance where the gate will swing. See, we went through a lot of iterations of how to deal with the gate so that it wouldn't be a weak spot in our fence fortress. At first we were thinking a ramp, but that seemed really hard to construct (miter cuts anyone?) so then we thought, maybe a couple bricks, since we had some lying around. And then, we went to Menard's and went to town and bought a whole mess of pavers and even came up with a good pattern. Turns out, pavers are a lot of work!

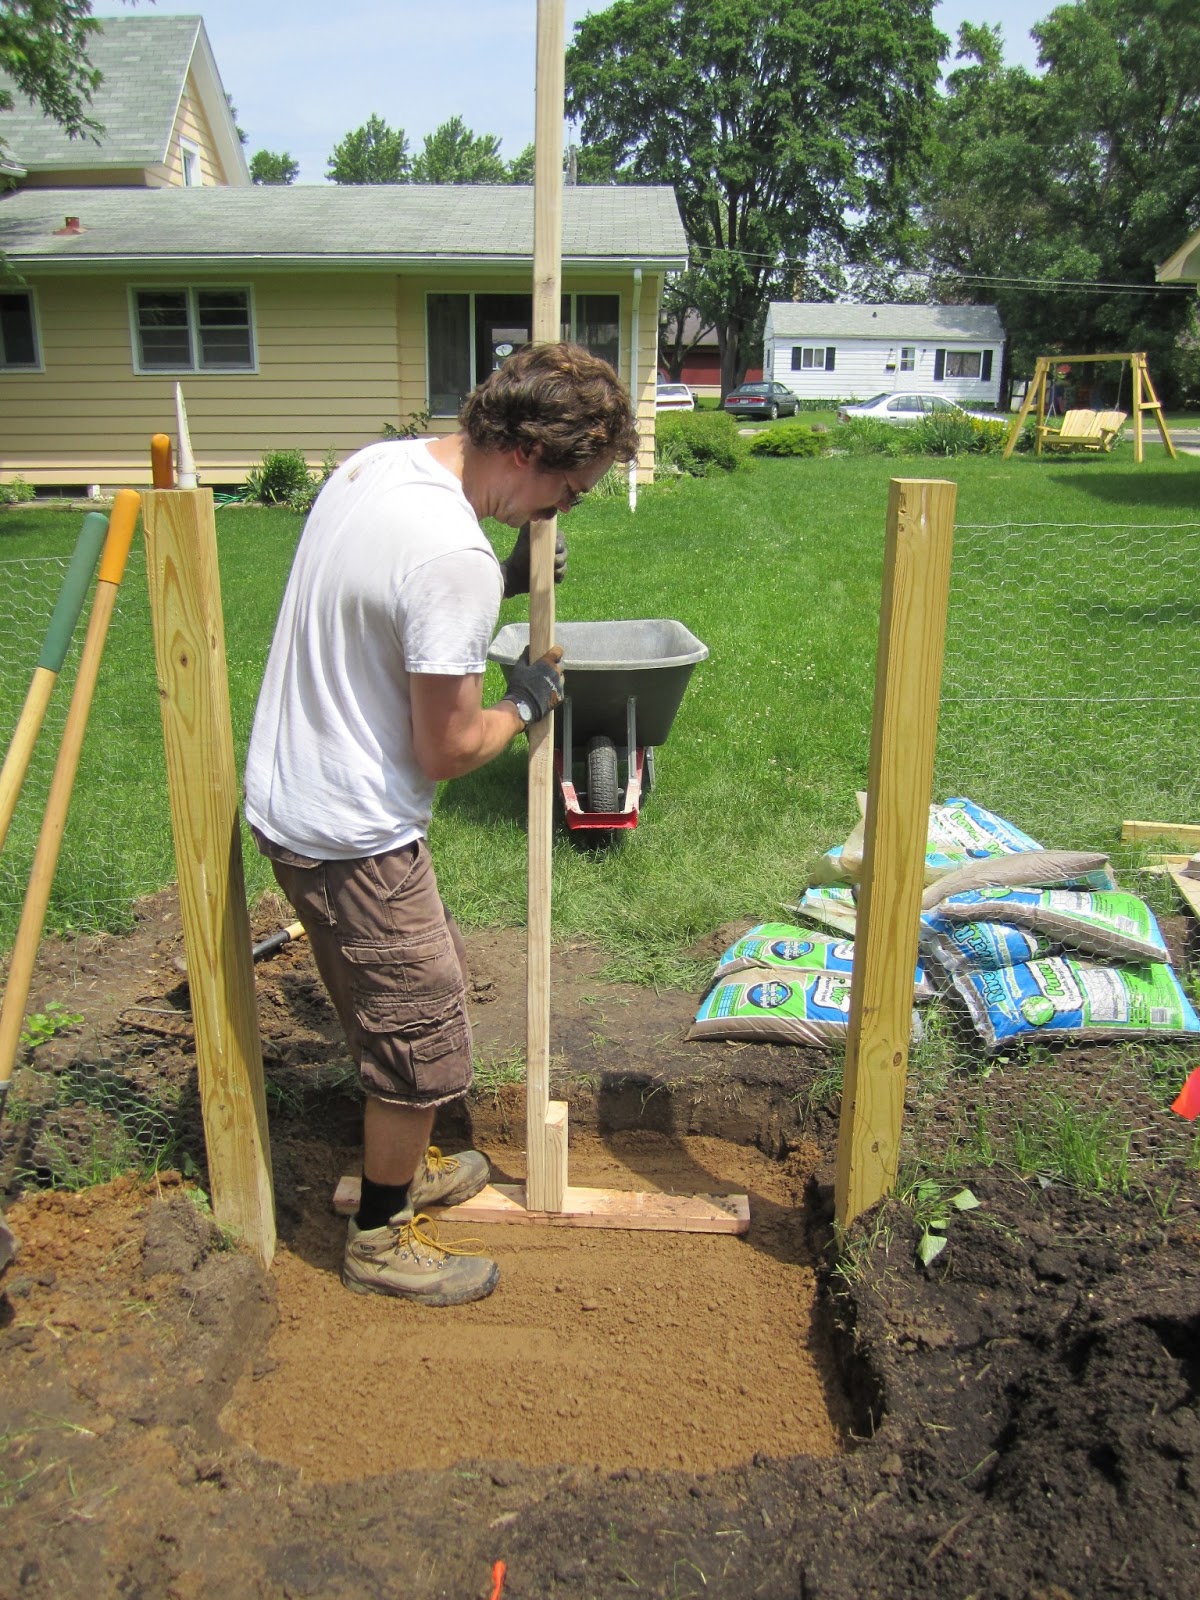
First you have to dig a hole deep enough for 4"-6" of paver base, then 1" of leveling sand and then the paver depth (in our case 2"). So, we were back to digging in the dirt, doesn't Matt looked thrilled? (and dapper in those black socks and boots I might add)


Then, we had to tamp down the dirt. Now, we've looked at tampers the last three times we were at Menards and each time have managed to talk ourselves out of buying one. Even on the day we bought the pavers, for some reason, we thought, gee, even though we need to tamp down the dirt, and sand, and pavers, we don't really need a tool especially devised for that purpose... right? So, since we didn't have the tool we so desperately could have used, we made our own. If it looks like an upside down prop used to hold drywall to a ceiling, its because it is. Matt did a pretty awesome job using it and even made up a little dance and song to go along since the technique basically involved using his foot to help the tamping by sort of hopping up and down on it.


 But it worked, look how pretty and smooth!


Next step, paving sand, which also had to be tamped down so that it was about 3" below the ground level. The hardest part was getting it all nice and level in all directions.


Now, at this point, we took a break to go and get 1/8 of a cow. Yes, you read that right. Roy's brother owns a farm and every couple years Roy and Rayanne get part of a cow. The rest is up for grabs and since we were pretty much out of the last round, we jumped on the chance. We got 107 lbs of steak, roast and burger which is now happily residing in our freezer downstairs until we can eat it all up. In any case, since we were already out, we decided to go and get a couple more bags of sand and the right tool for the job, a tamper.


Then we carefully laid the pavers in a pattern that really doesn't show well in this picture below, but is easier to see in the one at the very end, I promise. After making sure everything was level (ish) we added the finishing touch, locking sand. Locking sand is a polymer concrete like mix that fuses when it gets wet. It helps keep the blocks from shifting and prevents anything from growing in the cracks.


Of course, since it fuses together when it gets wet, you really only want it in the cracks. The bag said to fill the holes, tamp to settle the sand, sweep off the excess and, if possible, use a leaf blower to clear the excess. Now, you know us, we do not have a leaf blower (or a snow blower, or a riding mower, etc) so we had to do some improvising. Turns out the air compressor my parents got Matt for his birthday came with an air gun attachment. So we put it to good use and in no time we were ready to wet everything down.


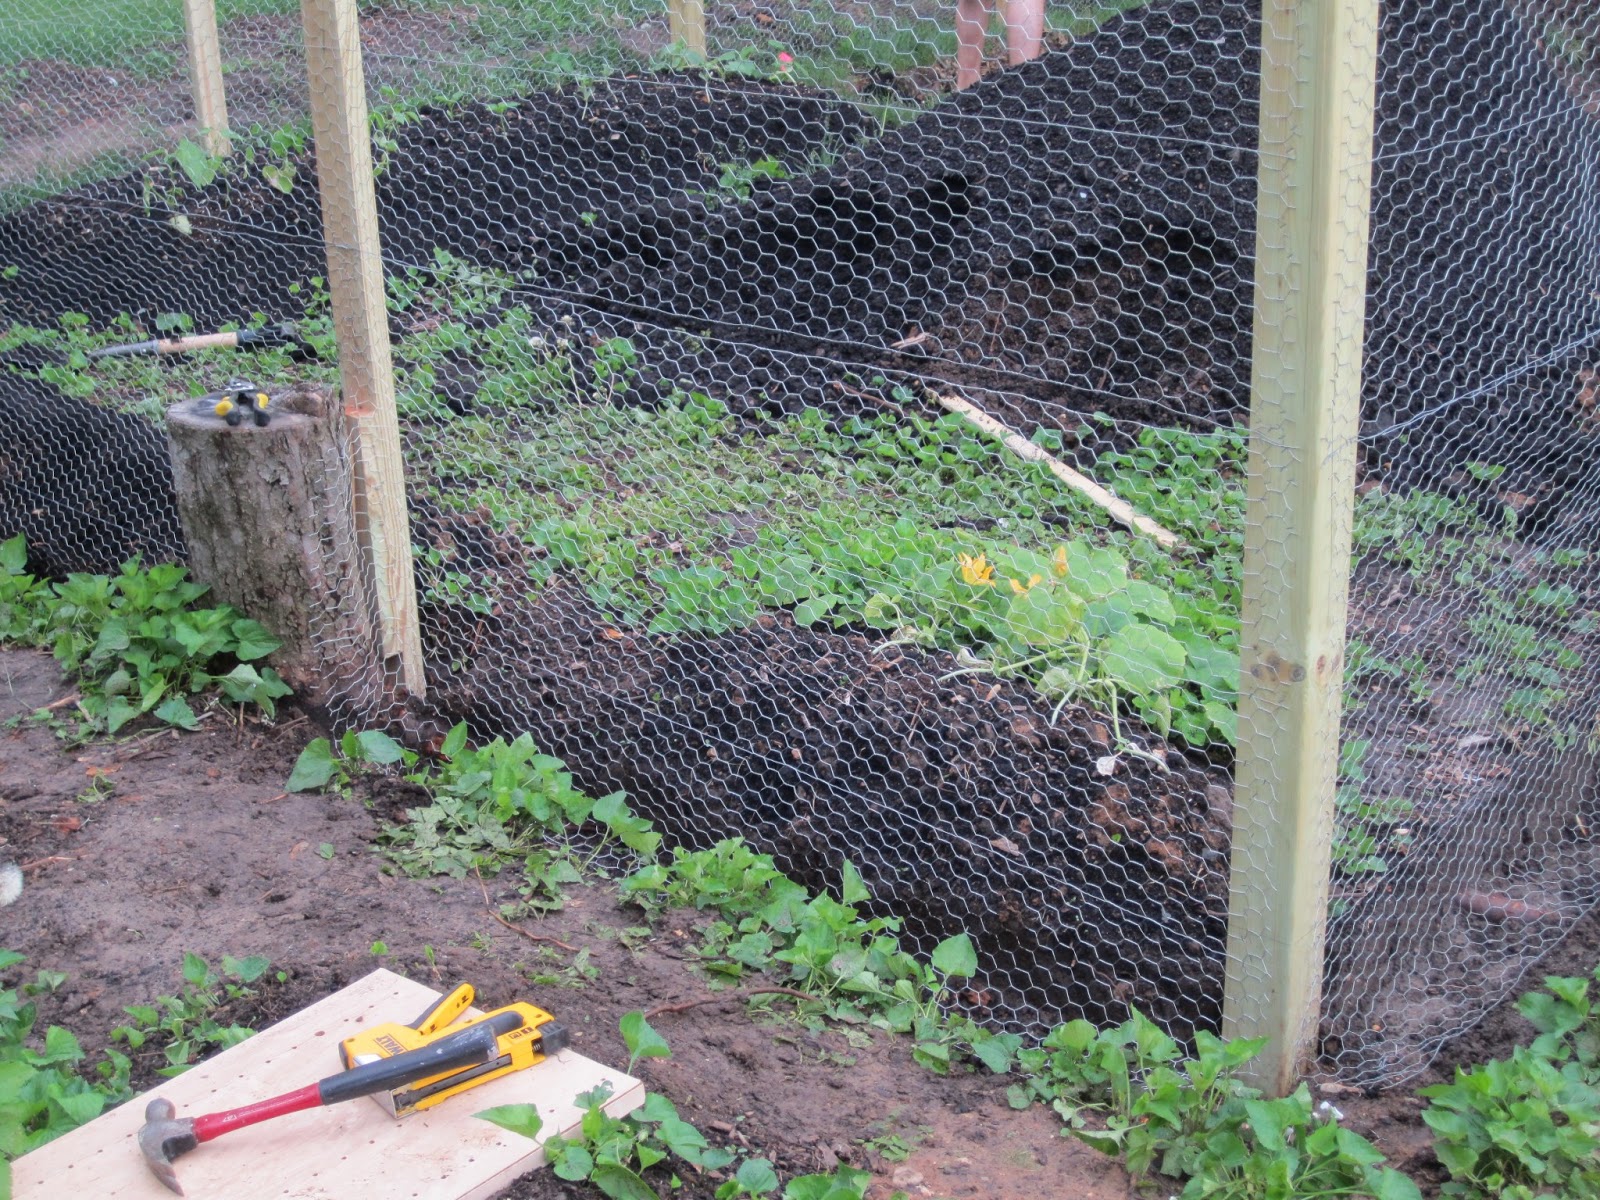
We had to mist the sand three times in the first hour and then it needed to rest for 24. While we were waiting for the hour to pass, Matt mowed the front lawn and I put up some more of the fence. And if you are saying to yourself, hey, it looks like the trench around the outside is more filled in than it was before, you are right. James kindly helped us out while we were working on the pavers by filling almost all of the remaining trench. We have great friends, seriously.


Just 4 boards and a gate away from victory! well, and caps for the posts, and maybe some flower beds around the outside, but who's counting? And, as promised, here's a better pick of the paver design. We're going to cover the residual locking sand around the outsides with dirt so you won't even notice.


Monday, June 3, 2013

New axle and the fence

So our poor little subaru has been struggling for some time. Its been complaining, and groaning, and finally we decided to give it a little TLC. So Matt took it to our good friend Doug at Foreign Car (on Regent, they are amazing) and he infomed us that in addition to needing a new tire and an alignment, the front right axle had given its last. So, we bought a new one and Matt went to work. While I was out Friday he disassembled pretty much all of it. You can see the shiny new one on the left and the crummy old one on the right. 

Here Matt is working away.


We also got a new ball joint (since in taking the axle off you pretty much always damage the ball joint. We even went to harbor freight and got a kit to do it, but then Matt came up with the great idea to use a pitman arm puller and pickle fork (just fyi, he had to say these words like three times before I got them right for this post). In any case, with a little bit of leverage, it popped right out and he was able to put in a shiny new one. 


 We also worked on the garden. Earlier this week we started getting the second bed filled in. Like the first, this involved layering the soil and the compost, over and over and over. Here's and action shot of Matt throwing some compost around.


We left off a little above ground level and took a little time out to finish up the fence (also at night during the week)


And I finished up the side bed and planted some tomatoes there.


Then, once the weekend rolled around, we headed out to menards to get some more wood for the fence. While we were there, we also decided to buy some plain pine to make boxes for the beds. We were thinking this would be an activity we would wait to do, but digging the bed during the week made it clear that putting the boxes up before building the bed above the ground would make it a lot easier to build the bed. So, while Matt was working on the car I cut up some 4x4s with our new circular saw. Then I cut the 12" boards to the right lenght and we assembled them


Like this:


And this:


Here it is over the existing bed


And here are the finished beds ( we filled in the second one and topped the first one off around the edges)


 And then I finished planting the second bed, so we are finally done planting!


Finally, we put up the horizontal pieces on one of the sides. If you look closely, you can see that we also put face plates on the posts so that you can't see where we stapled everything together. Looks pretty good if I do say so myself. 


Granted, we still have a gaping hole where the gate will go, but for now the left over piece of drywall covering it will do. We're getting there, slowly but surely.